My 4G Restoration Blog

User avatar
paul.wirdnam
Holder of a Silver Anorak
Posts: 641
Joined: Fri Apr 08, 2011 7:50 am
Location: Okeford Fitzpaine, Dorset, UK
Contact:

Re: My 4G Restoration Blog

Post by paul.wirdnam »

I know many people don't "do" Facebook (FB), but the Ariel Motorcycle group on FB has served me well over the last couple of years. I sold my 1930 Model F via FB, and this weekend, a plunger rear stand arrived for my 4G from Spain from a guy who saw my request for help on FB. And I'm very pleased with it; fits like a glove and looks virtually new-old-stock.

Made up the spring top mountings and stand bolts in stainless and fitted a temporary ?BSA? rear stand spring that I had lying around:

1) Why do we use thackery washers on rear stand bolts? (always wondered this)
2) Having removed the 3 nuts, spacer and spindle, how do you separate the 3 stud QD rear wheel from brake drum? Is it just the pegs keeping it together?

Image

Image
Paul
User avatar
paul.wirdnam
Holder of a Silver Anorak
Posts: 641
Joined: Fri Apr 08, 2011 7:50 am
Location: Okeford Fitzpaine, Dorset, UK
Contact:

Re: My 4G Restoration Blog

Post by paul.wirdnam »

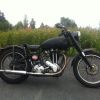
Having got the bike onto a secure rear stand, time to take out the 3 stud QD rear wheel...except the QD bit wasn't having it :evil: . I removed the 3 stud nuts holding the brake drum to the hub, then the spindle and spacer from the offside. At this point, the wheel hub should have come away leaving the brake drum still bolted to the nearside frame lug.

Tapping it didn't seem to help, so eventually I decided to remove the complete wheel with drum still attached and investigate off the bike. In the end, I did manage to separate the two with gentle tapping of pins and sprocket. I think the 9 locating pins were just clogged with decades of dirt:

Wheel hub with drum removed showing the 9 locating pin holes and 3 larger holes for the threaded studs:

Image

Back of brake drum showing pins and threaded studs:

Image

Inside of brake drum:

Image

I've been quite careful in documenting how all the pieces of the rear hub + drum bolt together and in what order. I'm fortunate in that all the pieces look to be correct, in good condition and correctly assembled. The 3 stud QD wheel and plunger frame seems to a rare combination and many of the parts are not the same as the 3 stud QD wheel on a rigid frame.

Top row shows the drum parts. From right to left is: the drum spindle, MJ7/8 ball bearing with shields either side and circlip, spacer on inside of brake plate, spacer on outside of brake plate (only fits one way due to step on internal bore), snail cam adjuster, nut. The spindle is hollow and accepts main spindle below.

Bottom row shows the hub parts. From right to left is: main spindle, fork sleeve locknut, snail cam adjuster, fork sleeve, main spacer.

Image

Image

I'll investigate the hub bearings tomorrow. Oh, and having got the rear wheel out, I can now see just how bad plunger link bushes can get --- I'd heard that they can wear out quickly leading to poor handling. Mine are shot to pieces :cry: .
Paul
nevhunter
Holder of a Platinum Anorak
Posts: 5051
Joined: Tue May 10, 2011 9:42 am
Location: Victoria.. Australia.
Contact:

Re: My 4G Restoration Blog

Post by nevhunter »

There looks to be a crack at 12 o'clock in your top picture. All of that hub plus the Anstey links must add up to a lot of weight.. Nev
User avatar
paul.wirdnam
Holder of a Silver Anorak
Posts: 641
Joined: Fri Apr 08, 2011 7:50 am
Location: Okeford Fitzpaine, Dorset, UK
Contact:

Re: My 4G Restoration Blog

Post by paul.wirdnam »

nevhunter wrote:There looks to be a crack at 12 o'clock in your top picture. All of that hub plus the Anstey links must add up to a lot of weight.. Nev
:o Nev, you got me rushing to the garage to check....but it is just a scratch:

Image
Paul
nevhunter
Holder of a Platinum Anorak
Posts: 5051
Joined: Tue May 10, 2011 9:42 am
Location: Victoria.. Australia.
Contact:

Re: My 4G Restoration Blog

Post by nevhunter »

Thought it might be worth checking. Pretty rare, the detachable wheels, aren't they? Nev
User avatar
paul.wirdnam
Holder of a Silver Anorak
Posts: 641
Joined: Fri Apr 08, 2011 7:50 am
Location: Okeford Fitzpaine, Dorset, UK
Contact:

Re: My 4G Restoration Blog

Post by paul.wirdnam »

The final part of my 3 stud QD rear wheel: the hub bearings.

Nearside (drum side) on the left, offside on the right. You can see in this photo that the LJ7/8 ball bearing on the nearside slides onto the hollow threaded spindle and locks up against the shoulder with the hex nut. When inserted into the hub, the outer race of this nearside bearing then pushes hard up against the shoulder in the hub by the brass threaded ring. So everything is locked up on the nearside:

Image

Image

But it seems strange that the LJ7/8 ball bearing on the offside almost floats in the hub. It cannot go very far into the hub due to the shoulder on the spindle but it never goes anywhere near the shoulder in the hub --- as you can see, there is plenty of original Ariel paint in the hub where the bearing sits. The only thing stopping the bearing moving outwards is that spring wire clip that fits in the groove of the hub:

Image
Paul
User avatar
paul.wirdnam
Holder of a Silver Anorak
Posts: 641
Joined: Fri Apr 08, 2011 7:50 am
Location: Okeford Fitzpaine, Dorset, UK
Contact:

Re: My 4G Restoration Blog

Post by paul.wirdnam »

Almost a month since my last update, but I have been busy ;)

Working from the back towards the front, I now have the oil tank off. Most cycle parts I will get powder coated but I don't like taking oil tanks for shot blasting, so it will be hand painted. It's cleaned up well..and with no issues that I can see:

Image

Image

Gearbox is also out and shows signs of being well used, so numerous parts ordered from Geoff: top hat bushes, sleeve gear bushes, main bearing, kickstart shaft & quadrant, fork selectors. Actual gears and teeth are OK.

But the case has lost its clutch cable outer support lug and has this brass repair:

Image

Image

Image

I did think about leaving it despite being hideous, but more importantly, the cable hole did not line up with the arm, so I decided it had to go and be replaced with a Lumiweld repair:

Image

New piece of aluminium, V-ed on both sides:

Image

Image

Image

Not a perfect job, but better than it was and strong:

Image
Paul
User avatar
chris.shearwood
Holder of a Silver Anorak
Posts: 646
Joined: Mon Feb 28, 2011 5:28 pm
Location: Sutton, Quebec, Canada
Contact:

Re: My 4G Restoration Blog

Post by chris.shearwood »

Paul,
Wow, that looks very well done. Nice work! Did you happen to make a video of the Lumiwelding being done?
Regards, Chris
1946 4G and 1951 VH
User avatar
Eero.Korhonen
Holder of a Golden Anorak
Posts: 1049
Joined: Tue Sep 04, 2012 10:02 am
Location: Oulu, Finland
Contact:

Re: My 4G Restoration Blog

Post by Eero.Korhonen »

Hi,
It is looking good job.
Br, Eero
Ariel VH 1954, IZH 350 1962, H-D Sportster Hugger 1992, AOMCC Member 133
User avatar
paul.wirdnam
Holder of a Silver Anorak
Posts: 641
Joined: Fri Apr 08, 2011 7:50 am
Location: Okeford Fitzpaine, Dorset, UK
Contact:

Re: My 4G Restoration Blog

Post by paul.wirdnam »

chris.shearwood wrote:Paul,
Wow, that looks very well done. Nice work! Did you happen to make a video of the Lumiwelding being done?
Regards, Chris
Thanks Chris! No, sorry, no video by me but I'm sure there must be loads of YouTube videos of people using Lumiweld. I first used it in the 1990s to repair a BSA Blue Star rocker box...and have been using it ever since. There are some broken thread bosses in my 4G crankcase (see below), but I'll get those professionally TIG welded...I'd never be able to get enough heat into those large cases for Lumiweld...and in any case, I find Lumiweld very hard to file, drill, tap etc...it's hard stuff.

To relieve the boredom of dealing with frames, mudguards, stands etc, I've taken a few covers etc off the engine:

Coupling gears look OK and now need to pull them off. Got the diagrams for the puller from Paul J (many thanks!) so will make one over the next few weeks...but do any of you know Peter Batten?, well he lives about 5 miles from me, has a number of interesting Ariels including a '38 4G...and he has a puller I can borrow! Will still make my own since it seems an essential tool for any 4G owner.

Image

On the timing side, I finally managed to undo all the nuts, and remove the sprockets and chain. Thank you Rob J for the tip about 2p pieces jammed in the coupling gears --- that did the trick and didn't even damage the 2p pieces. The tensioner and spring was missing and the fibre rubbing strip is very badly worn...and two damaged thread bosses and damaged spring strip anchor point, but all repairable, so not concerned:

Image

Image

Just had to take the head off to look inside. Looks pretty good actually and std bore still:

Image

Image

Image

And finally took the engine out and onto the bench...so it's back to sorting out all the frame parts etc for power coating and getting parts ready for chroming. I've yet to see if my tank is petrol tight... :shock:

Image

This '39 bike does seem to have been well used. The gearbox shows lots of signs of wear (bearings, bushes, quadrant) and yesterday I got round to dismantling the rear plungers, which are shot to pieces with one bush being worn right through the side wall. And this engine has no engine number and is std bore --- a factory replacement maybe; the oil pump is dated "55". I haven't got to the forks yet, so no idea what the spindles and bushes in those are like.... :cry:
Paul
Post Reply

Who is online

Users browsing this forum: Google [Bot] and 17 guests