
A pair of 600mm Record plumbers stilsons will remove the fork seal holders. I have on occasion had to resort to them on old forks when the proper tool would not work. The stilson jaws will however mark the fork seal holder. Sometimes if you wrap the fork seal holder with thin leather before using stilsons the holder will unscrew, and there will not be any damage. Only use the stilsons on the bottom part of the seal holder.
David
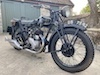
My 1951 NH Red Hunter Project
-
david.anderson
- Holder of a Golden Anorak

- Posts: 1532
- Joined: Mon Mar 28, 2011 4:52 am
- Location: south coast NSW Australia
- Contact:
-
pappleton

- Holder of a Nylon Anorak

- Posts: 217
- Joined: Fri Dec 13, 2013 8:08 am
- Location: Dorset / Thailand
- Contact:
Re: My 1951 NH Red Hunter Project
guessing that you won't be reusing the oil seal holders, why not try a bit of heat? I had good results on removing the stanchion adapters with a plumbers blowtorch.
BR Paul
BR Paul
Paul Appleton '53 VH plunger, '53 VHA rigid - in many boxes, '58 H.D. pan/shovel rigid
-
nevhunter
- Holder of a Platinum Anorak

- Posts: 5051
- Joined: Tue May 10, 2011 9:42 am
- Location: Victoria.. Australia.
- Contact:
Re: My 1951 NH Red Hunter Project
If you can get access to a reasonable sized Lathe. Grip it with the 3 or 4 jaw chuck and aluminium or copper protection. Unlikely to mark even new chrome. Put the front axle in each fork in turn. Nev
-
Brian.Fosh
- Holder of a Nylon Anorak
- Posts: 209
- Joined: Tue Apr 14, 2015 7:52 pm
- Contact:
Re: My 1951 NH Red Hunter Project
Hi, For info,
My '51 Sq4 had a chrome tank. The works dispatch ledger is held at the VMCC library (Draganfly have a copy and dated my bike ). It showed by frame & Engine number that mine left the factory Feb 5th 1951.
Also, announced by "The Motor Cycle" 8th Feb 1951, p145, referring to their Jan 25th article predicting the same for most manufacturers, that owing to the current nickel shortage, Ariel were first to change . Ariel motorcycles "...will be leaving the factory forthwith with the new painted tank finish", saying as follows:
"...Lustrous red is standard on the Square Four, Red Hunter Twin, on the two Red Hunter Singles (NH & VH) , and on the VCH Competition mount. In the cases of the de luxe twin and the VB side-valve model, tanks will be finished in black, and black is optional on the 1000cc Square Four models. All tanks are gold-lined and carry a bold, modernistic motif on each side. The appearance is most pleasing - so much so that it is doubtful whether even the most pro-chromium enthusiast will not be an immediate convert!" ...
The same magazine has an Ariel full page ad on the front cover showing a Sq4 still with Chromed tank, but no chrome flash beneath the badge. (that chrome flash represents a comet with a tail by the way)
Tank dents are repairable by cutting and lifting/peeling back a flap in the base & welding this up after knocking out the dents. Mine cost £480 to Chrome at S&T near Bristol... it so very much sets the bike off, in my mind it was well worth every penny... they are able to fill small dents and any small holes that appear during the early plating stages using solder. Their process, unlike many, can plate over solder/lead. In straight commercial terms, judging by the good comments I receive, I suggest the resale value of the bike could well be more than uplifted by the cost of the plating.
hope this helps.
Brian
-
James Hickman
- Holder of a Nylon Anorak
- Posts: 128
- Joined: Wed Aug 23, 2017 1:55 pm
- Contact:
Re: My 1951 NH Red Hunter Project
Thanks all for the input - managed to remove the oil seal holders with the use of heat and a Stilson wrench as suggested. Also relieved to have successfully removed two broken off studs from the fork legs and two small broken off screws from the spring shrouds using heat, 3:1 oil, a drill with a steady hand and a small stud extractor. Thanks also Brian for info re the tank.
Last edited by James Hickman on Sun Oct 08, 2017 7:29 am, edited 1 time in total.
'50 NH 350 (Shiny)
'29 Model B (Oily Rag)
'29 Model B (Oily Rag)
-
john.whiting
- Holder of a Golden Anorak
- Posts: 1837
- Joined: Sun May 22, 2011 2:10 pm
- Location: Brisbane QLD
- Contact:
Re: My 1951 NH Red Hunter Project
There is an ideal tool for this kind of job,called a Permelee Pipe Wrench.It grips all the way round,and doesnt mark.These wrenches are still made,but as they are over 100 years old,are very often seen at swap meets for a few bucks.There s lots on ebay,but usually at silly prices.(being US made they are dear new.).
-
James Hickman
- Holder of a Nylon Anorak
- Posts: 128
- Joined: Wed Aug 23, 2017 1:55 pm
- Contact:
Re: My 1951 NH Red Hunter Project
Thought it was time for another update...
I sent off the petrol tank to Andrew Mawrey (motorcycledentremoval.co.uk) with some trepidation, having just corresponded by e-mail. It arrived back 10 days later dent-free! I can’t see how he does it but, however he does, it looks so much better.
I’m now preparing it to go off to The Finishing Touch in Chelmsford (http://www.classicmotorcyclepaintwork.com) for chroming and painting. Colin tells me he can match the paint from that remaining beneath the badges and will also paint my new stainless steel wheel centres for me. I had to remove the enamel tank badges. They are fixed with small screws with a blob of solder melted onto the head to look like rivets – these need to be melted before the screws can be removed. Frustratingly, a small section of white enamel fell out of the “A” – but I managed a reasonable repair with white milliput. I’m keen to keep the old badges as they retain a slight patina that I am losing with the rest of the restoration. I’ve also had the tank rubbers sitting in plastic bags coated in silicon spray for 6 weeks which have rejuvenated them somewhat and have given them a coat of tyre dressing to good effect. The knee grip mounting plates needed a coat of paint and I’ll loosely assemble it all before sending off. I did try filling the tank with petrol and was initially optimistic that there were no leaks. However there does appear to be slight seepage (although no dripping) from the seams at the front of the tank, so a POR-15 tank sealing kit is on order.
The forks have turned out to be more challenging than expected. Having painstakingly stripped and painted them, the right fork has proved a devil to assemble. The lower bush would only slide about 2” down the fork leg. I cleaned the leg out with wire wool on long forceps to no avail. I then mounted the lower bush on a large diameter dowel and mounted this in the piller drill and “eased” it with emery cloth as suggested elsewhere on the AOMCC forum. This seemed to work – however when pushed fully home the top bush was difficult to fit and the stanchion effectively seized in the fully compressed position. I suspect (as has also been suggested on the forum) whatever incident caused the bend in the right stanchion also caused a slight deformity of the fork leg. As I write I am awaiting another (bought with some other secondhand front suspension parts on e-bay).
Finally, today I took the frame to GT Blasting in Bridgwater where, for £40, Luke blasted off all the old paint and rust – together with the stands, brake pedal and foot rests. The frame has now had a good coat of etch primer (I'm going for Cellulose rather than powder coat) and I’ve painted the brake pedal and foot rests with Eastwood Chassis paint – that I also plan to use for the engine plates and hubs. Attached is a picture of it in my "spray booth" ( a cheap gazebo with a fan heater and polythene walls)
I sent off the petrol tank to Andrew Mawrey (motorcycledentremoval.co.uk) with some trepidation, having just corresponded by e-mail. It arrived back 10 days later dent-free! I can’t see how he does it but, however he does, it looks so much better.
The forks have turned out to be more challenging than expected. Having painstakingly stripped and painted them, the right fork has proved a devil to assemble. The lower bush would only slide about 2” down the fork leg. I cleaned the leg out with wire wool on long forceps to no avail. I then mounted the lower bush on a large diameter dowel and mounted this in the piller drill and “eased” it with emery cloth as suggested elsewhere on the AOMCC forum. This seemed to work – however when pushed fully home the top bush was difficult to fit and the stanchion effectively seized in the fully compressed position. I suspect (as has also been suggested on the forum) whatever incident caused the bend in the right stanchion also caused a slight deformity of the fork leg. As I write I am awaiting another (bought with some other secondhand front suspension parts on e-bay).
Finally, today I took the frame to GT Blasting in Bridgwater where, for £40, Luke blasted off all the old paint and rust – together with the stands, brake pedal and foot rests. The frame has now had a good coat of etch primer (I'm going for Cellulose rather than powder coat) and I’ve painted the brake pedal and foot rests with Eastwood Chassis paint – that I also plan to use for the engine plates and hubs. Attached is a picture of it in my "spray booth" ( a cheap gazebo with a fan heater and polythene walls)
Last edited by James Hickman on Wed Nov 01, 2017 12:33 pm, edited 1 time in total.
'50 NH 350 (Shiny)
'29 Model B (Oily Rag)
'29 Model B (Oily Rag)
-
ian.scott
- Holder of a Silver Anorak

- Posts: 674
- Joined: Sat Jan 07, 2012 9:22 pm
- Location: Oxfordshire
- Contact:
Re: My 1951 NH Red Hunter Project
That looks an excellent job, but I think you have the email address wrong. It should be https://www.motorcycledentremoval.co.uk/
Ian
Ian
-
James Hickman
- Holder of a Nylon Anorak
- Posts: 128
- Joined: Wed Aug 23, 2017 1:55 pm
- Contact:
Who is online
Users browsing this forum: No registered users and 21 guests