My SF31 Restoration Blog

MatteoFoppoli
Posts: 19
Joined: Tue Nov 01, 2011 12:19 pm
Contact:

Re: My SF31 Restoration Blog

Post by MatteoFoppoli »

Thanks Paul :D
You can get a picture of the lever on the frame?
thanks
User avatar
paul.wirdnam
Holder of a Silver Anorak
Posts: 641
Joined: Fri Apr 08, 2011 7:50 am
Location: Okeford Fitzpaine, Dorset, UK
Contact:

Re: My SF31 Restoration Blog

Post by paul.wirdnam »

MatteoFoppoli wrote:Thanks Paul :D
You can get a picture of the lever on the frame?
thanks
No, sorry...off being plated.
Paul
Geoffbrown
Posts: 23
Joined: Sat Feb 26, 2011 6:58 pm
Contact:

Re: My SF31 Restoration Blog

Post by Geoffbrown »

What a magnificent job you are making of it well done, can't wait to see the finished job
MatteoFoppoli
Posts: 19
Joined: Tue Nov 01, 2011 12:19 pm
Contact:

Re: My SF31 Restoration Blog

Post by MatteoFoppoli »

Hi Paul,

Where did you get the Lever?

thanks Matteo
User avatar
paul.wirdnam
Holder of a Silver Anorak
Posts: 641
Joined: Fri Apr 08, 2011 7:50 am
Location: Okeford Fitzpaine, Dorset, UK
Contact:

Re: My SF31 Restoration Blog

Post by paul.wirdnam »

New Year's Day 2012:

Just a small update. Lots of hand painting going on and bits hanging from all high places in my garage:

Image

Image

But have made some progress on the bottom half of the engine. All Helicoiling done, new main bearings fitted in the crankcase and new big end has arrived. I've bought and fitted a new timing side mainshaft as the oil pump driving scroll was badly worn; this new shaft is shown in the photo below:

Image
Paul
User avatar
paul.wirdnam
Holder of a Silver Anorak
Posts: 641
Joined: Fri Apr 08, 2011 7:50 am
Location: Okeford Fitzpaine, Dorset, UK
Contact:

Re: My SF31 Restoration Blog

Post by paul.wirdnam »

February 2012:

With the temperature in my garage at -1C, progress is slow but I did pay a visit to the platers today :D :

Image
Paul
User avatar
paul.wirdnam
Holder of a Silver Anorak
Posts: 641
Joined: Fri Apr 08, 2011 7:50 am
Location: Okeford Fitzpaine, Dorset, UK
Contact:

Re: My SF31 Restoration Blog

Post by paul.wirdnam »

Early March 2012:

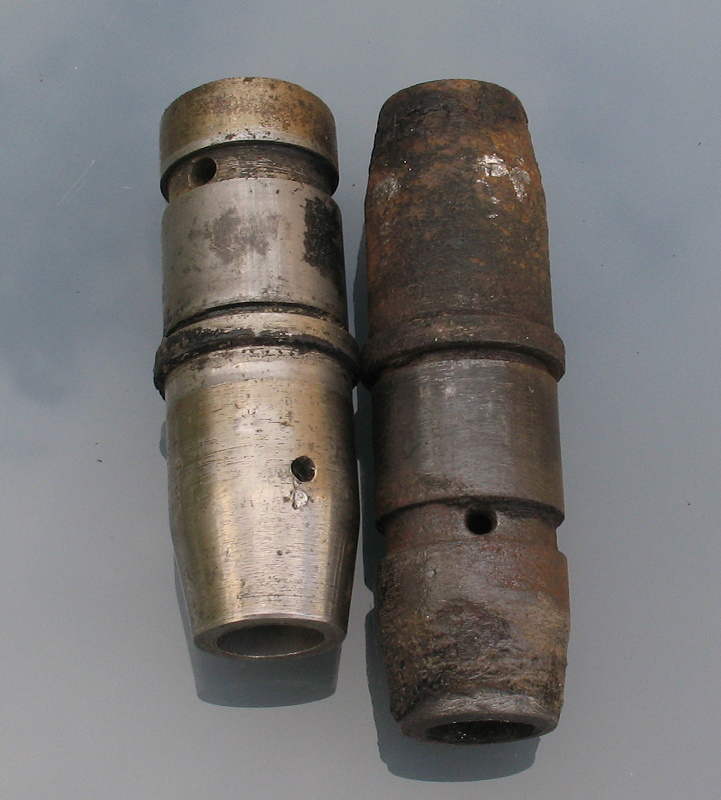
Started work on the engine at the beginning of the year but the oil pump has caused me no end of problems. I had been warned, by other Sloper owners, that this was the Achilles' Heel of the model but I didn't think it would take me quite so long to sort it out. To those not familiar with the model, the pump is made from Mazac / monkey / pot metal and, as a result, swells over time --- it then gets jammed in the crankcase and the steel gears within it also seize on their shafts. In severe cases, the driving dogs break.

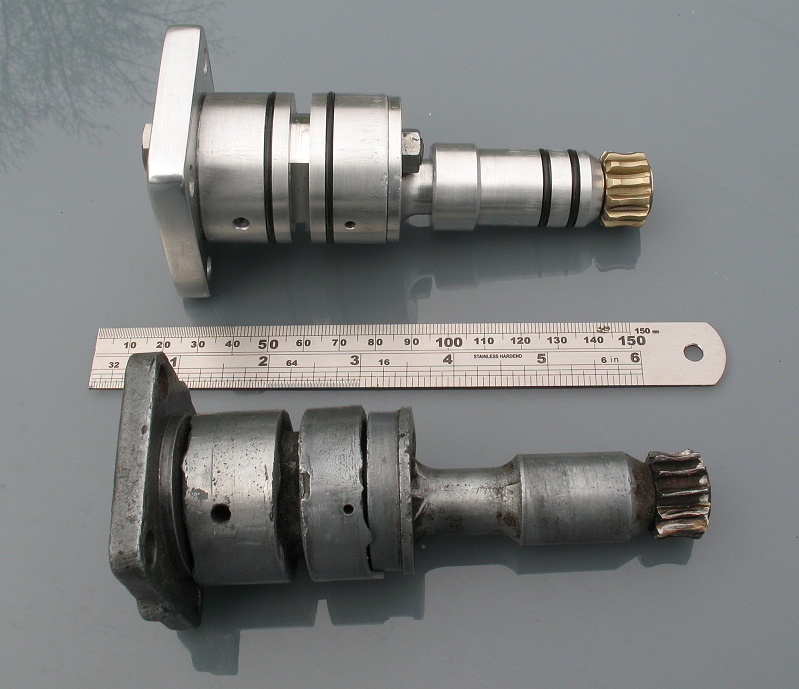
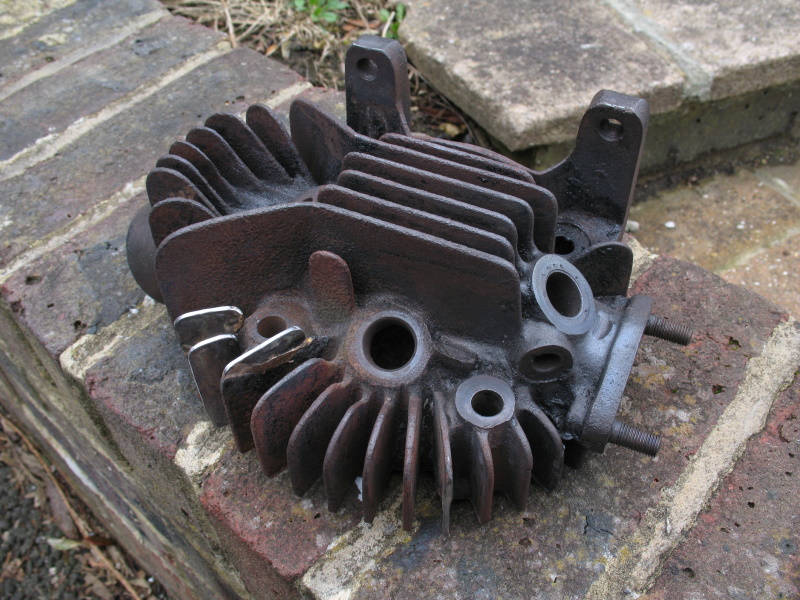
Things weren't too bad on my pump. The internal steel gears were fine although a previous owner has emeryed the shafts a little so as to free them off in the pot metal. The bottom flange on the main central section had largely broken off and the top driving gear (2234-31) was badly worn...as was the worm gear on the timing side mainshaft.

Image

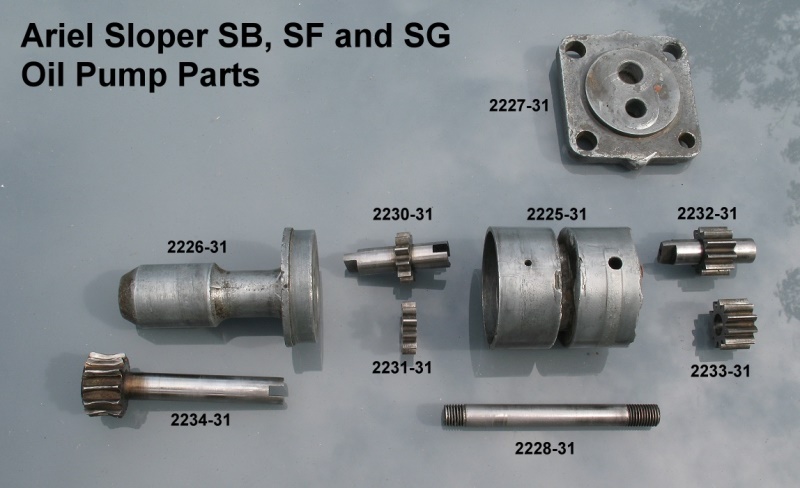
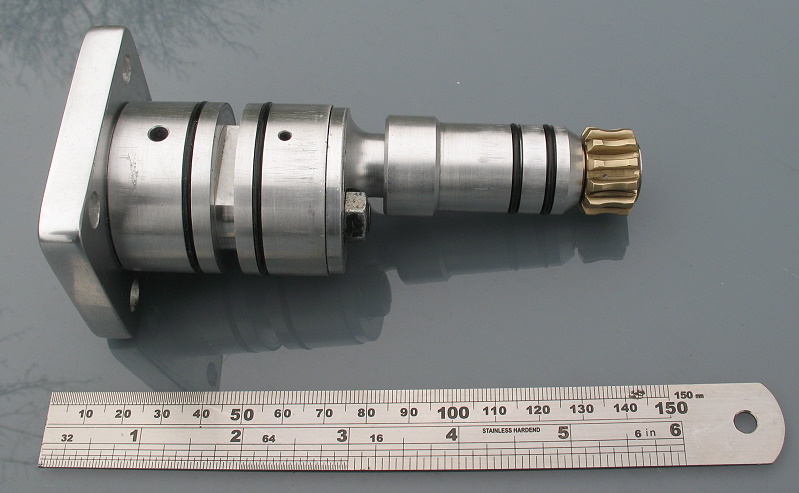
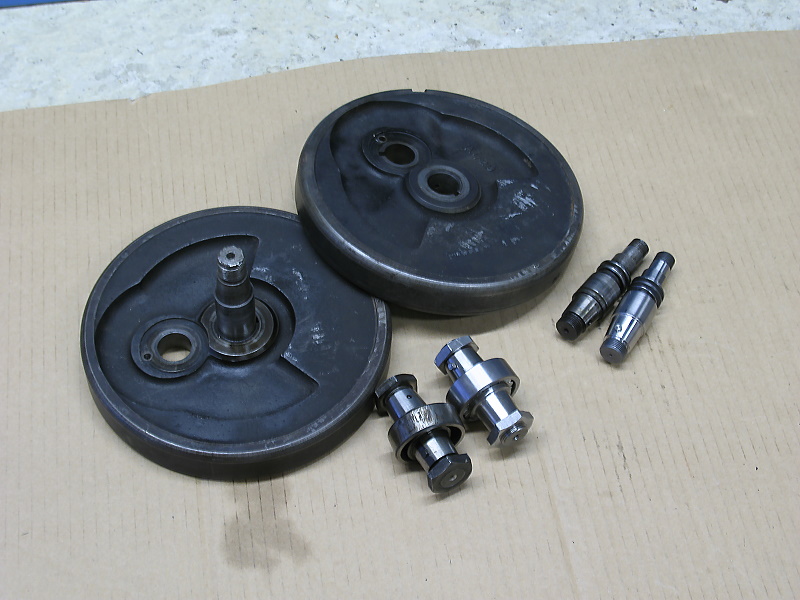
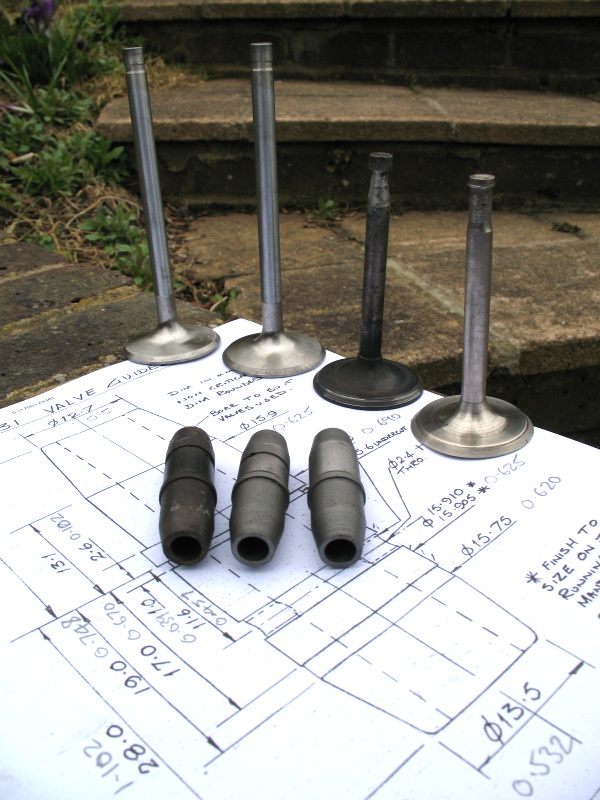
With a great deal of help and expertise from Paul Meredith and Clive Jones, my pump now looks like below. Parts have come from all over:

1. Internal steel gears are from the original pump above
2. Main central section (2234-31) and the top (2226-31) came from Clive....who I think got it from Kim Mortensen...who got it from ????... (I added the two O rings as per Paul's design)
3. The new top is for the Cammy version of the pump and therefore was too short for the Sloper. Extension piece with O rings was made by Paul
4. The new driving gear and shaft (22234-31) also came from Paul.
5. The new base (2227-31) made by me

Have obtained all the parts and then bolted it together, it wasn't exactly turning smoothly in either direction. It took copious amounts of engineer's blue, lots of man hours, etc to work out where it was binding and then relieving it. I certainly didn't want to remove too much metal and loose oil pressure, so it was a slow process to repeatedly dismantle and reassemble each time. And then there was the problem of adjusting the end float between "crankcase stop-and-driving gear" and "driving gear-and-extension piece bush" on the outside of the pump --- too detailed to try and explain here.

Does it work? Yes, at least on the bench. In practise? No idea and Paul would like me to stress that his bronze gear and shaft remain untested at this stage but I don't mind being the guinea pig --- I have every confidence in this pump; and that confidence comes from his engineering skills and the number of hours I've spent working on the bl**dy thing!

Now the pump is finished, it can be assembled into the crankcase half and then the flywheel mainshaft passed through its ball bearing in this crankcase half to mesh with it. i.e. you cannot remove this pump once the flywheels are installed and the crankcase halves are together....so it needs to be right first time.

Image

Image
Paul
nevhunter
Holder of a Platinum Anorak
Posts: 5051
Joined: Tue May 10, 2011 9:42 am
Location: Victoria.. Australia.
Contact:

Re: My SF31 Restoration Blog

Post by nevhunter »

You are doing a very admirable job. The diemetal is bad stuff that was used on a lot of gear and other pumps. You have done well to replace it with something better. It looks as if the rate of rotation of that pump is quite slow, so it won't be a very high volume pump. The earlier plunger pump isn't either. Most gear pumps allow oil to seep through them when the engine is not in use, causing some "sumping". eg Norton
User avatar
paul.wirdnam
Holder of a Silver Anorak
Posts: 641
Joined: Fri Apr 08, 2011 7:50 am
Location: Okeford Fitzpaine, Dorset, UK
Contact:

Re: My SF31 Restoration Blog

Post by paul.wirdnam »

Mid March 2012:

Time for a few more photos of the engine rebuild ;) .

Not much needs doing on the barrel and piston; just some Cylinder Black and some new rings:

Image

But the head does need some work: new valves, new guides, new springs and some repairs to broken fins. I've probably restored 10-15 vintage bikes over the last 25 years but have never attempted fin repair, so this was a first. Wasn't nearly as bad as I was expecting. Having made and shaped the missing part out of some appropriate thickness steel plate and cleaned up the broken area on the head, I "tinned" both surfaces with flux and silver solder and brought them together. The joints look good but I guess I'll tell once the bike is on the road...make sure you're not following me :lol: . BTW: not going to attempt to repair the tall fin on the right side of the spark plug hole.

Of course, you do need to heat the head up to a fairly high temperature for silver soldering, and I used one of these:

Image

Image

Image

And on to the guides. Real mixed bag here: my inlet guide (left) was in upside down with a new oil hole drilled and with the top cut off...and my exhaust guide (right) was the wrong length and possibly from the side-valve sloper.

Image

So new guides have been made from cast iron bar (Meehanite) and to dimensions supplied by Paul Meredith (thanks Paul!). New valves start life as Manley BY11875-1 from the RealSteel.co.uk website. Their head size is very close to original valves, the stem diameters are 11/32 inch and they are very long...which means they can be cut to length and the stem reduced to take the collets:

Image

Valve springs are listed by Draganfly, so a set is on their way to me. My inlet valve springs had this chrome plated spring cover. It doesn't appear to be an Ariel part; at least it is not listed in the 1931 parts book. I can't decide whether to use it or not....it fits underneath the springs but it needs to be re-chromed first and that might hold things up.... :|

Image
Paul
User avatar
adrie.degraaff
Holder of a Golden Anorak
Posts: 3275
Joined: Sun Feb 27, 2011 10:07 am
Location: Holland
Contact:

Re: My SF31 Restoration Blog

Post by adrie.degraaff »

Hi Paul,
you have to use the same materal as the head otherwise it will brake more fin off your head.
I am using damaged 350 head fins.
Post Reply

Who is online

Users browsing this forum: Google [Bot] and 25 guests