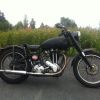
Saturday's photos before covers and clutch etc


Then on Monday morning, I tried to fit the oil tank. The usual sidecar mounting at the top plus a U clamp over the top frame tube and then the bottom mounting...except I couldn't workout what I was missing, or what was required. I had a hole in the engine plate that matched up with the bottom bracket on the tank. So was it threaded and covered in paint? Did I need a short, stubby bolt?

All the pictures of this engine plate in the parts book show a hole here...which is what I have. But no mention of a bolt and it would have to be a very short one as the gearbox adjuster is immediately behind the hole. Then I saw it; part number 0299 which is a 3/8" stepped stud that is welded on the back of the engine plate. Even more surprising, Drags have these in stock:

But no way was I going to wait for one of these to arrive and I really didn't want to have dismantle everything to get this engine plate out, welded and re-painted. In the end, I decided there was enough space to drill out this hole to take a 3/8" cycle tap but only if I slid the gearbox so that the oval hole in the top lug was behind the hole in the engine plate...then I could drill the hole and tap it. And to slide the gearbox that much, primary chain had to come off, therefore covers and clutch as well.
But I did manage to tap a good, clean hole and I've used Loctite 638 on a piece of 3/8" cycle studding in the new hole. It feels very tight and as it's not carrying any weight, I think it should be fine:

No idea what happened to the original welded stud. I'm sure it wasn't there when I bought the bike, so the oil tank must have been flapping about a bit at the bottom end. Sorting this out was like taking 2 steps forwards and 3 back.